
|
|
|||||||
| Quality Images and Videos Post your own images and videos of your own days |
 |
|
|
Thread Tools | Display Modes |
 08-29-2011, 08:24 PM
|
#286 |
|
Cleverly disguised as a responsible adult
Join Date: Jan 2001
Location: Dallas, TX
Posts: 3,338
|
I'm calling the shed project complete. I am far too tired to post pictures tonight.
I'll try tomorrow after running errands.
__________________
Never be afraid to tell the world who you are. -- Anonymous |

|

|
|
08-30-2011, 02:40 PM
|
#287 |
|
Cleverly disguised as a responsible adult
Join Date: Jan 2001
Location: Dallas, TX
Posts: 3,338
|
shed build project
As I promised, here is a photo diary of my shed build project. It took three days of hot, sweaty toil but it's done!
This first photo shows the beginning. Boxes of parts staged at the site. link The second photo shows the frame of the foundation built and levelled. link The third photo shows the foundation completed with my friend Anne driving in the last screws (yes, I used the proper deck screws for PT lumber). link Photo four shows the floor of the shed laid out and assembled and connected. Thus ended Day One of the project. link Day Two began bright and early to beat some of the brutal Texas heat. Photo five shows the walls in place. The directions made it look SO easy! Just insert tab A into Slot B and snap into place. HAH! link Photo six shows the major roof panels in place. This ended Day Two. link Day Three opened early also. By noon the temperatures are above 100 degrees, requiring frequent cool off breaks and about three liters of ice water each day. Photo seven shows the more of the roof and the doors installed. link Photo eight shows the end product after the last roof parts, skylights and smaller things like shutters in place. The shed has been shimmed to allow the doors to open and latch closed again, the windows to open and all the roof vents and screens installed. link I wish I could get the images to appear in the post like everyone else gets but I don't think I'm doing something right. All I get are tags. Apologies to everyone for all the clicking. Next time we order something like this, I will refuse to assemble it until the spring or fall.
__________________
Never be afraid to tell the world who you are. -- Anonymous Last edited by BrianR; 08-30-2011 at 02:44 PM. Reason: fixed broken link |
|
|
|
|
09-04-2011, 06:33 AM
|
#288 | |
|
We have to go back, Kate!
Join Date: Apr 2004
Location: Yorkshire
Posts: 25,964
|
Wow. That looks like a lot of work. Worth it though. Well done!
__________________
Quote:
|
|
|
|
|
|
02-18-2012, 03:23 PM
|
#289 |
|
Master Dwellar
Join Date: Aug 2003
Posts: 4,197
|
okie dokie. here we go again. the other day i went and bought a new dishwasher as ours died about a year and a half ago. i forgot to take pics of the removal of the old one but here is the installation of the new one. i took basic step by step pics to hopefully show someone that this is a project that is relatively easy, albeit could be difficult depending on your ability to turn wrenches, hammer to fit and paint to match. the washer was delivered this morning and right out of the box i saw that i was going to 1. have to go to home depot and buy a 3/4" to 3/8" elbow to hook up the water line and 2. improvise on hooking up the electrical. i improvised using a spare computer cord. i cut the end off and stripped it back about 1.5" - 2" or so then stripped back the 3 conductors to connect in the junction box under the washer. after twisting the wires (remember, black is the hot wire and white is the neutral) i used wire nuts and electrical tape to secure the nuts so they wont come loose through vibration of the unit. it's always a good idea to tape them regardless. after securing the electrical cord and attaching the drain hose extension i positioned the unit in it's little cubby hole but not all the way as to give room to work/connect shit. i fed the drain hose through the side of the cabinets and attached the hose to the disposal using a hose clamp. next connect the water feed to the unit. oh, don't forget to use Teflon tape on the fittings. after connecting, turn the water valve on and check for leaks now. it would suck to complete the installation then have to take it out because it leaks. after checking that push the unit in place an make sure it's level. after that secure the unit to the counter top and take the washer for a test run!
eta: oh yeah, don't forget to hook up the ground wire (green) to the unit junction box.
__________________
For your dreams to come true, you must first have a dream. Last edited by plthijinx; 02-18-2012 at 03:29 PM. |
|
|
|
|
02-18-2012, 03:24 PM
|
#290 |
|
Master Dwellar
Join Date: Aug 2003
Posts: 4,197
|
.
__________________
For your dreams to come true, you must first have a dream. |
|
|
|
|
02-18-2012, 03:25 PM
|
#291 |
|
Master Dwellar
Join Date: Aug 2003
Posts: 4,197
|
..
__________________
For your dreams to come true, you must first have a dream. |
|
|
|
|
02-18-2012, 03:26 PM
|
#292 |
|
Master Dwellar
Join Date: Aug 2003
Posts: 4,197
|
...
__________________
For your dreams to come true, you must first have a dream. |
|
|
|
|
02-18-2012, 05:58 PM
|
#294 |
|
LONG LIVE KING ZIPPY! per Feetz
Join Date: Mar 2003
Location: Arkansas
Posts: 7,661
|
well done cept you need a bushing or romex fitting for the cord going thru the box knock out
__________________
"Success is getting what you want. Happiness is wanting what you get. " Brother Dave Gardner |
|
|
|
|
02-19-2012, 12:19 AM
|
#295 |
|
Goon Squad Leader
Join Date: Nov 2004
Location: Seattle
Posts: 27,063
|
Well done plt! I agree with zippy, put some kind of protection for that electrical cord going through that sheet metal hole, eh?
I also see you're getting better with that camera including some left handed shots. Nice work!
__________________
Be Just and Fear Not. |
|
|
|
|
02-19-2012, 12:59 PM
|
#296 |
|
Master Dwellar
Join Date: Aug 2003
Posts: 4,197
|
yeah i'm going to go to home depot and get a bushing to put in there. i did think about that (after i'd already gone to home depot) when i was hooking up the cord.
thanks BigV i am doing a smidgen better with it. in january Dr. Froth (a member here that lurks mostly) had a concert and i ran all over the place from front stage to backstage snapping photos. i think i have them public on my facebook....
__________________
For your dreams to come true, you must first have a dream. |
|
|
|
|
02-19-2012, 03:22 PM
|
#297 | |
|
Master Dwellar
Join Date: Aug 2003
Posts: 4,197
|
Quote:
__________________
For your dreams to come true, you must first have a dream. |
|
|
|
|
|
04-08-2012, 04:45 PM
|
#298 |
|
LONG LIVE KING ZIPPY! per Feetz
Join Date: Mar 2003
Location: Arkansas
Posts: 7,661
|
Not the way i wanted to spend an easter morning !!!!
I was pouring a cup of coffie this morning bare footed , suddenly my foot was wet " WTF !!!!!!" Looked at the bace board , wet , FUCK !!!!! looked under the sink , WET, FFFUUUUUCCCCKKKKKK !!!! and it had been wet for a while , FUCK !!!!! So I grabbed a hammer and a pry bar and started stripping wet MDF board away ( why do they even make that shit ????? it USELESS !!!) under the kitchen cabnets  DSCF7694 by zippyt, on Flickr 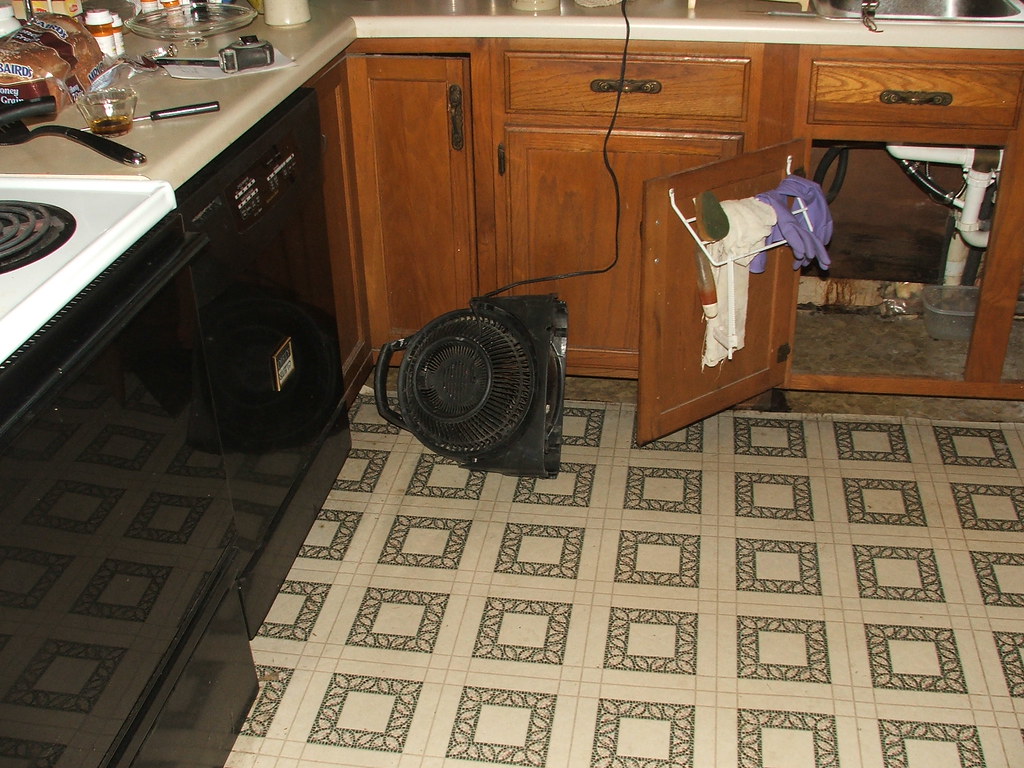 DSCF7695 by zippyt, on Flickr Fans UP !!! Here's the Leaken Byotch that caused this ! 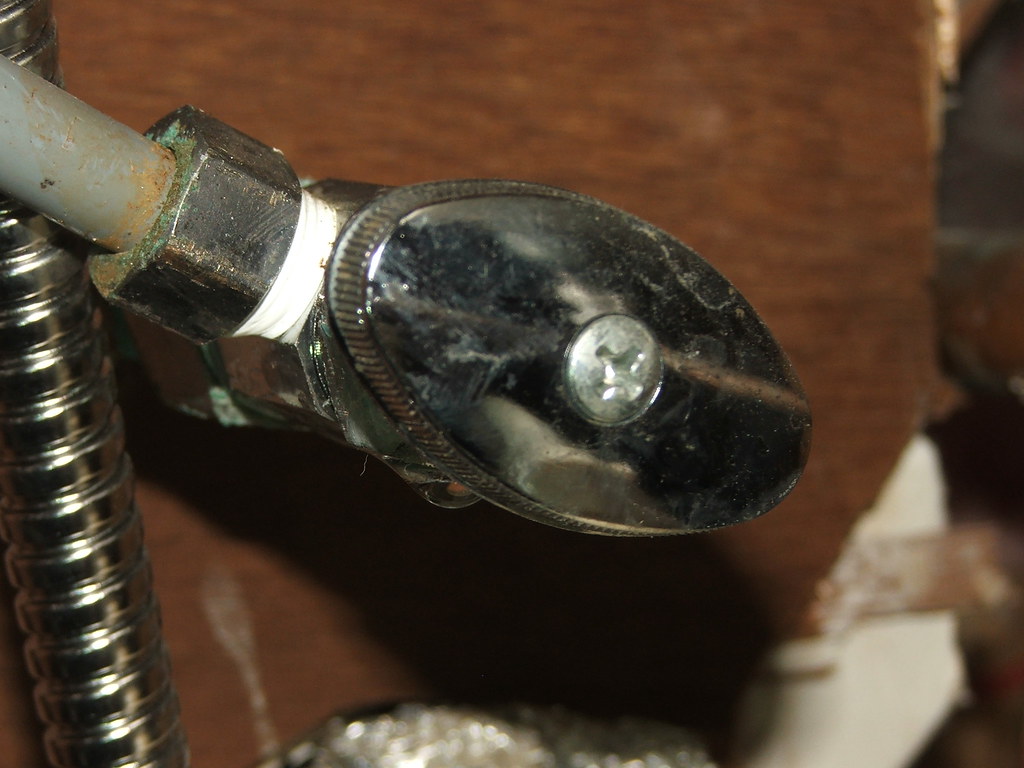 DSCF7698 by zippyt, on Flickr And heres what it did , 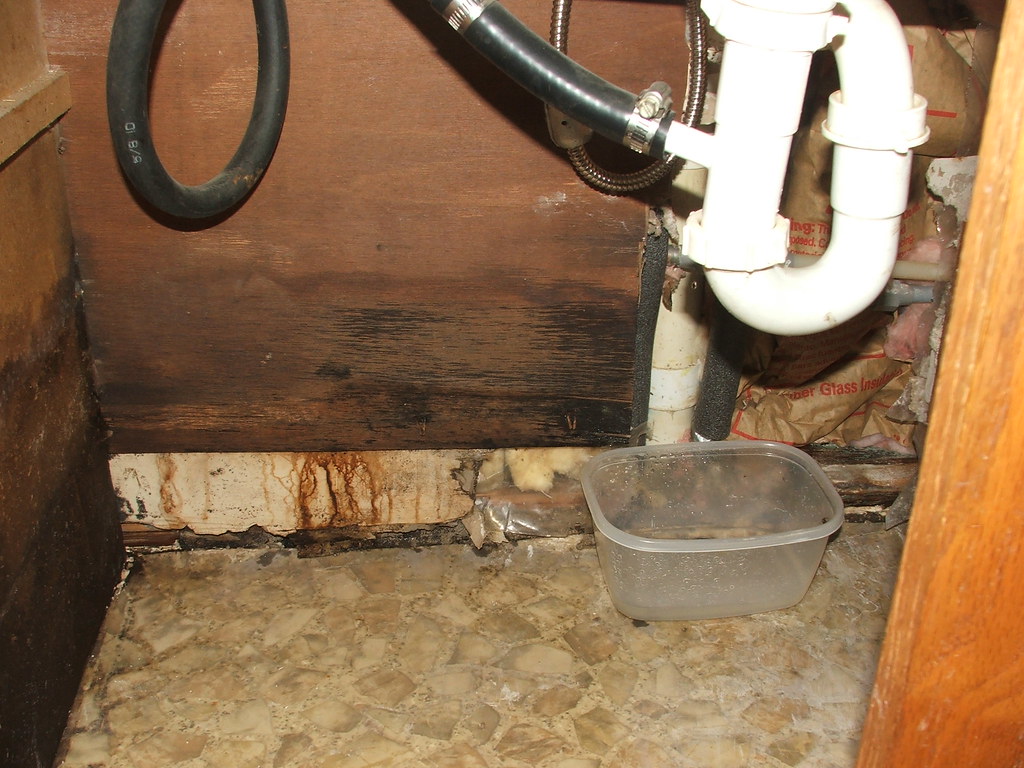 DSCF7702 by zippyt, on Flickr 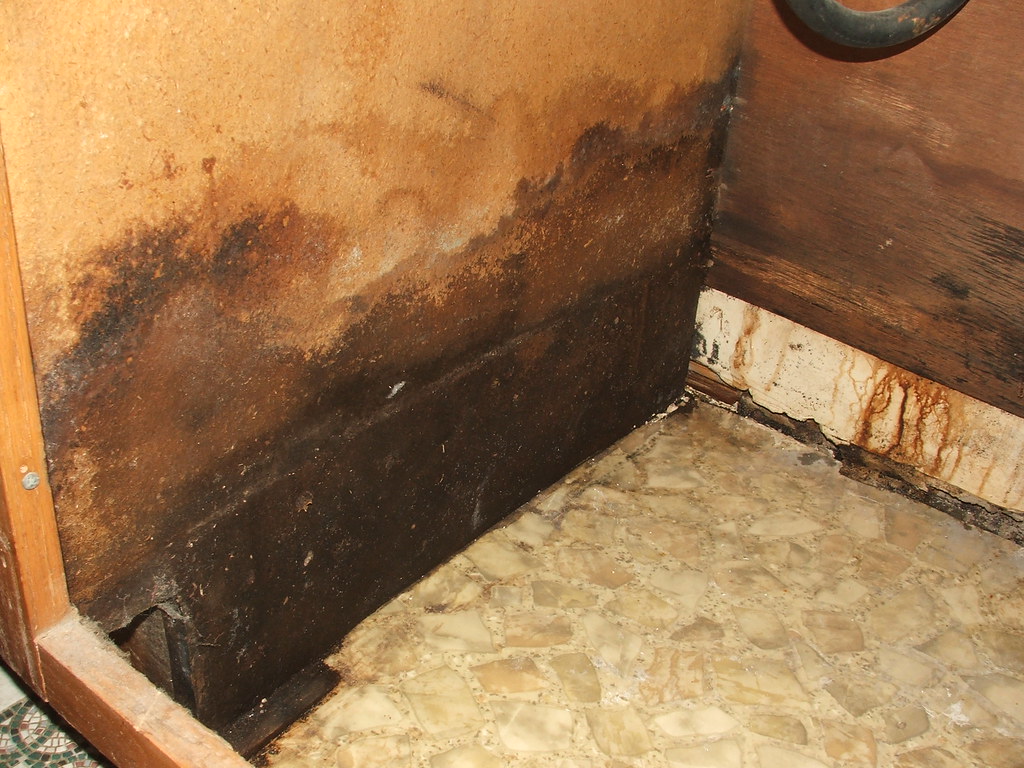 DSCF7703 by zippyt, on Flickr New fitting in place , but the pic i took to show you all , well i saw a small drip  DSCF7705 by zippyt, on Flickr so i thaught i was done , but well i guess i have to mess with it a LITTLE More
__________________
"Success is getting what you want. Happiness is wanting what you get. " Brother Dave Gardner |
|
|
|
|
04-08-2012, 04:55 PM
|
#299 |
|
Master Dwellar
Join Date: Aug 2003
Posts: 4,197
|
tape measure? check!
spatula? check! shot of whiskey? CHECK!
__________________
For your dreams to come true, you must first have a dream. |
|
|
|
|
04-08-2012, 05:20 PM
|
#300 |
|
LONG LIVE KING ZIPPY! per Feetz
Join Date: Mar 2003
Location: Arkansas
Posts: 7,661
|
ugh that Shot is bacon greese ,
take a shot ifn you want , but i think it would be a Little thick going down here is the drip and drop , hard to see untill i looked at it full screen 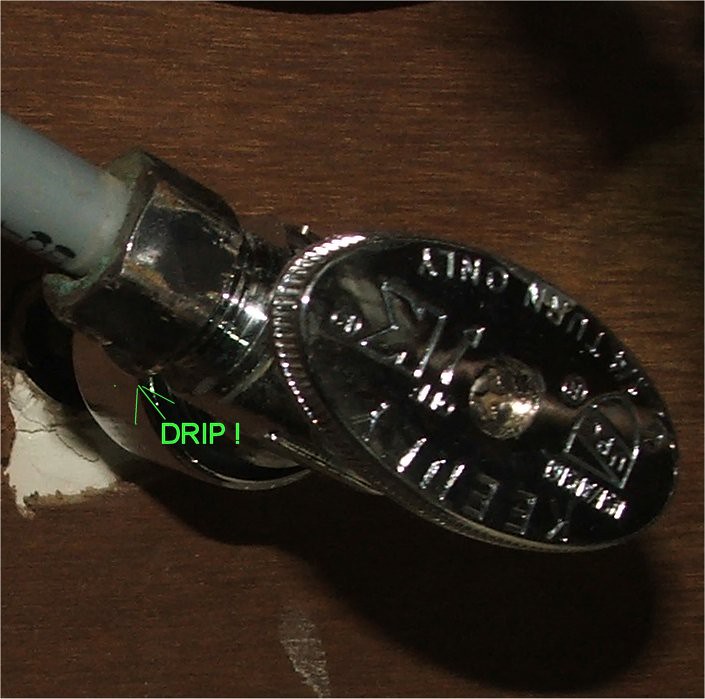 drip by zippyt, on Flickr drop 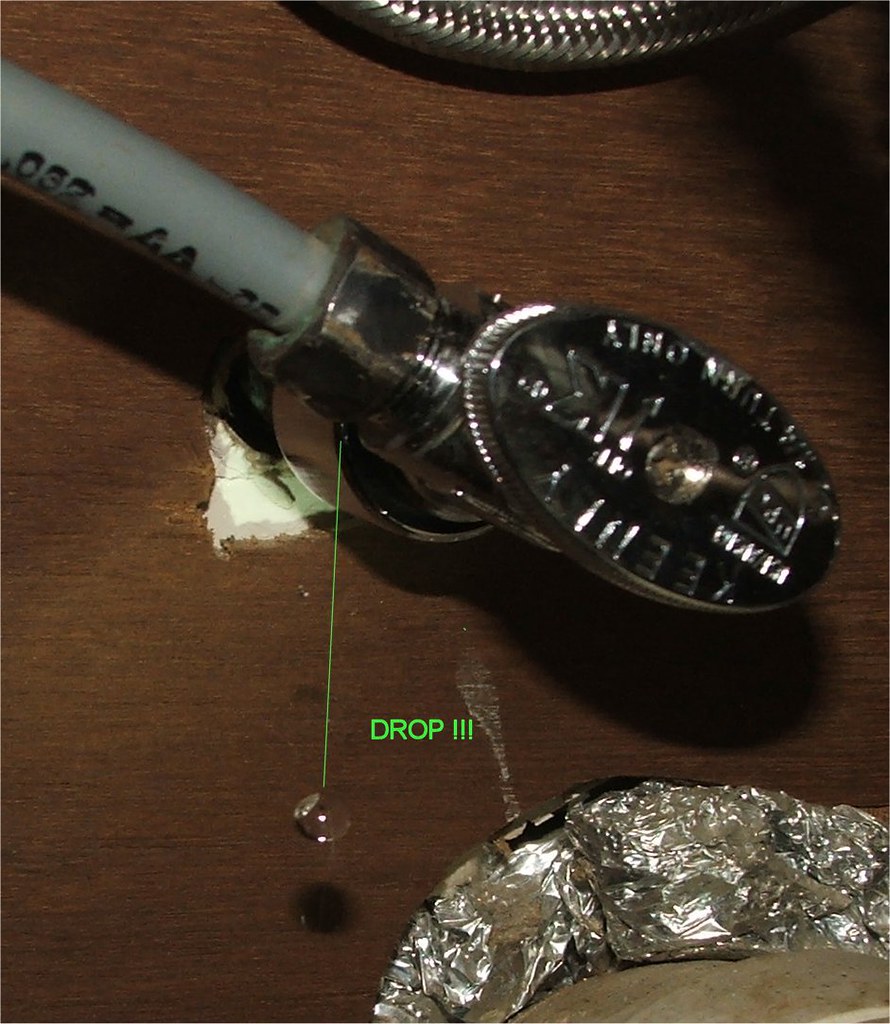 drop by zippyt, on Flickr
__________________
"Success is getting what you want. Happiness is wanting what you get. " Brother Dave Gardner |
|
|
|
|
| Currently Active Users Viewing This Thread: 1 (0 members and 1 guests) | |
| Thread Tools | |
| Display Modes | |
|
|


 Linear Mode

